
Bathroom Renovation Ideas on a Budget Without a Contractor
Table of Contents
A tired bathroom with dated fixtures, worn grout, and dull finishes does not automatically require a full professional remodel. If the layout and major plumbing are still in good condition, you can make a noticeable difference with smaller projects such as painting, replacing hardware, refreshing the vanity, improving storage, and repairing worn finishes.
The key is knowing which projects are genuinely suitable for DIY and which ones can create safety, moisture, or code problems if handled incorrectly. A smart budget renovation focuses first on improvements that change the appearance and function of the room without disturbing the parts of the bathroom that are working properly.
What Bathroom Updates Can You Realistically DIY Without a Contractor?
Many cosmetic and surface-level updates are reasonable DIY projects when you have the necessary skills and follow the product instructions. These can include painting, replacing cabinet hardware, installing a mirror, refreshing certain vanity surfaces, and replacing deteriorated caulk.
More technical work is different. Plumbing, electrical, structural changes, and work involving waterproofing systems can involve building codes, permits, specialized skills, or safety risks. Whether a permit or licensed professional is required depends on your location and the specific project, so check with your local building department before changing plumbing, wiring, walls, or the bathroom layout.
If you are a renter, focus on reversible improvements such as removable accessories, replacement hardware that can be stored for move-out, and paint if your lease allows it. the same no-drill, fully-removable mindset that works for setting up a rented balcony as a garden space applies well inside the bathroom too.
If you own the home, you have more flexibility, but permanent changes still deserve careful planning. A low-budget renovation is usually easier to control when you improve what already works instead of automatically replacing every fixture.
What Should You Plan Before Starting a DIY Bathroom Renovation?
Start with a realistic budget and priority list. Separate problems that need to be fixed from cosmetic changes that would simply make the bathroom look newer.
For example, a leaking faucet, damaged caulk, poor ventilation, or signs of water intrusion should take priority over a new mirror or decorative accessories.
Inspect for Water Damage Before Making Cosmetic Changes
Look carefully at the flooring, walls, ceiling, vanity, tub, and areas around plumbing fixtures.
Warning signs can include: soft or spongy flooring, persistent discoloration, bubbling or damaged paint, swollen wood or vanity panels, musty odors, recurring mold, water stains, and active leaks.
Do not simply paint or caulk over a moisture problem. The EPA is direct about this in its guide to mold and moisture control: the key to mold control is moisture control, and you should clean up any mold and fix the underlying water problem, not paint or caulk over moldy surfaces, since paint applied over mold is likely to peel anyway.
Check Your Bathroom Ventilation
Ventilation deserves attention before a renovation because bathrooms naturally produce a lot of moisture. Running the bathroom fan or cracking a window while showering is one of the simplest ways to keep humidity down and prevent mold from taking hold in the first place.
Before spending money on decorative updates, make sure your existing exhaust fan actually works. If condensation remains excessive or the room stays damp long after showers, the ventilation problem may need attention first.
Decide What to Keep
You do not have to replace a tub, toilet, vanity, or mirror simply because the bathroom looks dated.
If the existing fixture is structurally sound and functions properly, keeping it and improving the surrounding finishes can save money and reduce demolition.
For example, an older vanity may look completely different after new hardware, fresh paint where appropriate, a new mirror, and better lighting.
Plan Around Your Only Bathroom
If this is the only bathroom in your home, think carefully about the order of your projects.
Paint, hardware, and decorative changes can be completed separately. Flooring, vanity replacement, or other projects that make the room difficult to use require more planning.
Build extra time into your schedule for drying, curing, unexpected repairs, and material delays rather than assuming every project will finish in one weekend.
How Do You Update a Bathroom on a Budget?
A practical budget renovation can follow this order:
1. Declutter and Deep Clean
Remove unnecessary items and clean the bathroom thoroughly before deciding what needs to change. This helps you distinguish between a bathroom that is genuinely outdated and one that mainly needs better cleaning, organization, and a few targeted updates.
2. Fix Leaks and Moisture Problems First
Repair active leaks and investigate recurring dampness before covering surfaces with paint, caulk, or new materials, moisture control has to come before any cosmetic fix, not after it.
If you find extensive mold, significant water damage, or a problem you cannot safely identify, stop the cosmetic renovation and get appropriate professional help.
3. Refresh the Walls and Ceiling
A fresh coat of paint can make a bathroom feel dramatically different without changing the layout. Choose a coating appropriate for bathroom or high-humidity conditions and follow the manufacturer’s preparation and application instructions.
Do not paint over active mold or damp surfaces, clean and dry the affected area and address the moisture source first.
4. Update Hardware
Cabinet pulls, knobs, towel bars, toilet-paper holders, and other small hardware pieces can change the appearance of a bathroom without requiring a major renovation.
When replacing hardware, measure the existing holes before purchasing new pieces. Choosing replacements that match the existing hole spacing can make installation much easier.
5. Refresh the Vanity Instead of Replacing It
If the vanity box is in good condition, consider updating the parts that are actually worn. Depending on the material and manufacturer’s instructions, options can include: new cabinet hardware, fresh paint or a suitable refinishing product, a new mirror, better organization inside the cabinets, or a replacement countertop only if necessary.
Avoid refinishing a surface simply because it is inexpensive if the underlying material has serious water damage.
6. Refresh the Flooring Carefully
A bathroom floor can sometimes be updated without removing everything down to the subfloor. However, the existing floor must be suitable for the new material, clean, dry, stable, and properly prepared according to the flooring manufacturer’s requirements.
Do not install a new surface over a floor that is soft, damaged, unstable, or affected by an unresolved moisture problem.
7. Finish With Small Details
Once the functional work is complete, finish the room with practical accessories such as a new mirror, towels, a bath mat, storage baskets, shower storage, simple artwork, and matching hardware. These details can make the renovation feel complete without adding the cost of a full remodel.
High-Impact Bathroom Upgrades Beginners Can DIY
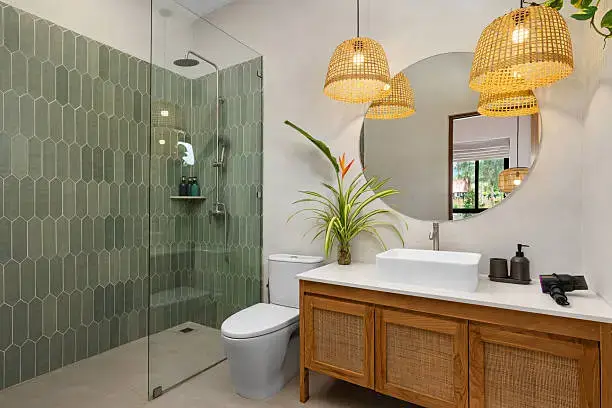
Not every improvement needs to involve demolition.
Recaulking worn seals. Old caulk around a tub or other wet area can become discolored, cracked, or separated from the surface. Removing failing caulk and applying a new bathroom-appropriate sealant can improve the appearance and help maintain the surface seal. However, new caulk is not a substitute for repairing an underlying leak or waterproofing problem, if water is already getting behind the surface, the source needs to be investigated before cosmetic repairs.
Updating cabinet hardware. Replacing cabinet knobs or pulls is one of the simpler ways to change the appearance of a vanity. Measure the distance between existing screw holes before purchasing replacements. If the new hardware uses a different spacing, you may need to drill new holes and properly patch or otherwise address the old ones.
Replacing a mirror. A dated mirror can make the entire vanity area look old. Replacing it with a new mirror can be a relatively straightforward cosmetic improvement, provided the mounting system is appropriate for the mirror’s size and weight.
Improving storage. Adding shelves, baskets, hooks, or over-the-toilet storage can make a small bathroom feel more functional without changing its layout. Focus on unused vertical space before adding bulky furniture to the floor. the same small-space organization principles that work in a cramped closet apply just as well here.
Updating lighting carefully. A new light fixture can make a major visual difference, but electrical work should not automatically be treated as a beginner DIY project. If the project involves altering wiring, adding a circuit, relocating electrical components, or otherwise changing the electrical system, check local requirements and consider using a qualified professional when appropriate.
What Mistakes Should You Avoid During a DIY Bathroom Renovation?
Painting over mold. Do not use paint or caulk to hide mold, it needs to be cleaned and the moisture source addressed first, or the problem simply reappears underneath the new surface.
Ignoring poor ventilation. A beautiful renovation will not solve a bathroom that remains excessively damp. Make sure moisture can leave the room effectively, whether through a working exhaust fan or an openable window.
Using the wrong materials. Bathroom surfaces are exposed to moisture, cleaning products, temperature changes, and frequent use. Always check whether a product is appropriate for the specific surface and environment before using it.
Starting demolition before checking what is behind the surface. Removing tile, flooring, cabinets, or walls can expose plumbing, wiring, damaged subfloors, or other problems that were not visible before. Before demolition, understand what you are removing and have a plan for unexpected discoveries.
Assuming every bathroom project is permit-free. Cosmetic work may not require a permit in many locations, but requirements vary. Once you move plumbing, alter electrical systems, change structural elements, or substantially change the layout, permit requirements can become relevant. Check your local building department before starting work that goes beyond straightforward cosmetic improvements.
Rushing waterproofing work. Waterproofing is one area where a seemingly small installation mistake can have consequences that remain hidden until significant damage has occurred. If you are not confident about the waterproofing system required for a shower or wet area, this is a good point to stop and consult the manufacturer’s installation instructions or a qualified professional rather than experimenting.
What Bathroom Projects Should You Not DIY?
A budget renovation does not mean doing every task yourself. Consider professional help for projects involving: moving or substantially changing plumbing lines, adding or changing electrical circuits, structural modifications, major shower waterproofing work when you do not understand the system, significant water damage, extensive mold or moisture problems, and work that requires a permit or inspection you are not qualified to complete.
The exact requirements depend on your location and project. A useful rule is simple: DIY the cosmetic work you understand, and get qualified help when the project affects safety, structure, plumbing, electrical systems, or hidden waterproofing.
How Much Does a DIY Bathroom Renovation Cost?
The cost depends heavily on the scope of the project, and figures vary a lot by region, so treat any number here as a rough starting point rather than what you’ll actually pay.
Angi’s 2026 cost data puts a typical DIY bathroom remodel at roughly $3,000 to $8,000, noting that a simple cosmetic refresh (paint, retiling small areas, refinishing a tub) can start around $1,000, while a more ambitious DIY project with higher-end materials can reach $10,000 or more. For comparison, Angi puts the average cost of hiring a professional for a full bathroom remodel noticeably higher, doing the work yourself typically saves a significant share of that labor cost, though exactly how much depends heavily on your local market and the scope of the project.
For a genuinely budget-focused project, it makes more sense to price the individual work you actually plan to do than to assume every bathroom renovation needs thousands of dollars. A useful budget checklist includes: paint and preparation supplies, caulk and repair materials, hardware, lighting or a mirror, flooring if needed, vanity materials, storage and accessories, tools you do not already own, and a contingency amount for unexpected repairs.
Keeping the existing layout and reusing sound fixtures are two of the simplest ways to control the scope.
DIY Bathroom Renovation vs. Hiring a Contractor
DIY and professional renovation each make sense for different situations.
DIY makes sense when: the project is primarily cosmetic, you are comfortable following detailed instructions, the existing bathroom is in good condition, you are not moving plumbing or structural elements, you have enough time to complete the work carefully, and you understand the limitations of your tools and skills.
Professional help makes more sense when: plumbing needs to be relocated, electrical systems need substantial modification, walls or structural components are being changed, there is significant water damage, waterproofing work is beyond your experience, the project requires permits or inspections you cannot appropriately manage, or the bathroom needs to remain usable on a tight schedule.
The biggest mistake is not choosing DIY over a contractor or vice versa. It is taking on a project that is beyond your skills simply because it appears cheaper at the beginning. A mistake involving paint or cabinet hardware may be relatively easy to correct. A mistake involving hidden water, electrical systems, plumbing, or structural components can be much more complicated.
What DIY Bathroom Updates Usually Don’t Require a Permit?
There is no single nationwide list of permit-free bathroom projects. Permit requirements are determined by the applicable local building codes and the specific work being performed.
Purely cosmetic changes such as painting, replacing decorative hardware, and adding accessories are generally less likely to trigger permits than work that changes plumbing, electrical systems, structural elements, or the layout.
Before beginning a project that goes beyond cosmetic work, check the website or office of your city or county building department for the rules that apply to your property. Do not rely on a general internet checklist as a substitute for your local requirements.
How Can You Save Money Without Making the Renovation Look Cheap?
The most effective budget strategy is not necessarily choosing the cheapest product for every part of the bathroom. Instead, decide where the existing bathroom is worth keeping and where a small change will have the biggest visual impact.
For example: keep a good-quality vanity and change its hardware, keep the existing tub if it is structurally sound, replace damaged caulk instead of replacing an entire tub surround, paint before considering a major wall treatment, improve storage before buying a larger vanity, replace one visibly dated feature instead of remodeling the entire room, and choose finishes that work with what you already have.
This approach keeps the project focused and reduces unnecessary demolition.
A Simple Weekend Bathroom Refresh Plan
If your bathroom is structurally sound and you want to start small, use this sequence:
Day 1: Clean and inspect. Declutter, deep-clean the room, inspect for leaks and moisture problems, and make a list of everything that needs attention.
Day 2: Paint and refresh. Complete wall preparation and painting if appropriate. Give the product enough time to dry according to the manufacturer’s instructions.
Day 3: Hardware and accessories. Install cabinet hardware, update storage, replace the mirror if appropriate, and add simple finishing touches.
For projects involving flooring, vanity replacement, extensive caulking, or other installation work, allow additional time rather than trying to force everything into a single weekend.
Final Thoughts
A budget bathroom renovation does not have to mean doing everything yourself or replacing everything in the room.
The most practical approach is to separate cosmetic improvements from technical work, fix moisture and damage before covering them up, keep sound fixtures where possible, and spend your budget on the changes that make the biggest difference.
Start with manageable projects such as paint, hardware, storage, mirrors, and worn surface finishes. When a project involves plumbing, electrical systems, structural changes, significant water damage, or waterproofing that you do not fully understand, getting qualified help can be far less expensive than repairing a DIY mistake later.
Can you renovate a bathroom without removing the tub?
Yes. If the tub is structurally sound and does not have an underlying leak or serious damage, you can refresh the surrounding area with new caulk, appropriate surface repairs, updated fixtures, paint where suitable, and other cosmetic changes.
What bathroom renovations usually don’t require a permit?
Simple cosmetic work such as painting and replacing decorative hardware is generally less likely to require a permit. However, permit requirements vary by location, and plumbing, electrical, structural, or layout changes may trigger additional requirements. Always check your local building department before starting work that goes beyond cosmetic changes.
How long does a DIY bathroom renovation take?
There is no reliable single timeline because the scope varies considerably. A simple cosmetic refresh may be completed over a few days, while flooring, vanity replacement, extensive repairs, or work requiring permits can take substantially longer. Drying and curing times, unexpected repairs, material availability, and the amount of time you can work each day can all affect the schedule.