Kitchen Backsplash Ideas You Can Install Yourself
Table of Contents
A bare wall behind the sink or stove can make a kitchen feel unfinished, even when everything else is clean and organized. A new backsplash is one of the quickest ways to fix that without renovating the whole room, and several styles are realistic for a first-time DIYer.
The catch is that the right choice depends on your budget, your skill level, the condition of the wall, and how much heat and moisture the spot gets. This guide covers the materials that work for DIY, layouts that forgive mistakes, what the project realistically costs, and where beginners go wrong.
One rule that applies to everything below: the instructions for your specific tile, adhesive, grout, and appliance beat any general advice here. Heat ratings, stove clearances, and drying times vary by product, so read the labels and your cooktop manual before you buy.
What Is a Kitchen Backsplash, and Why Does It Matter?
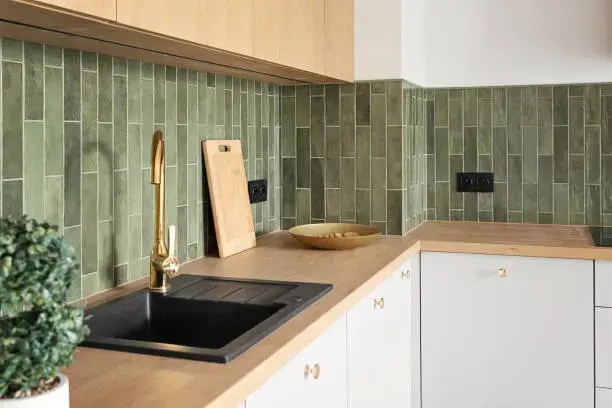
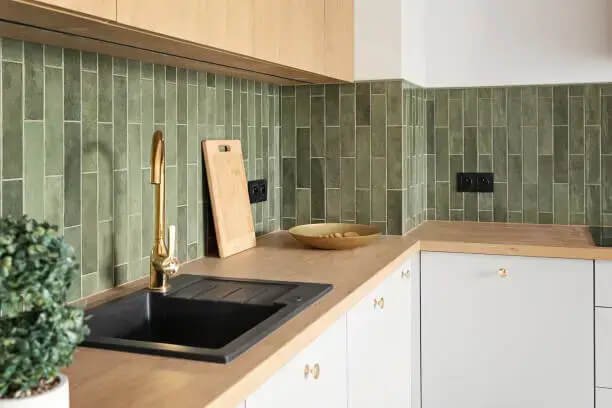
A kitchen backsplash is a protective surface on the wall behind a countertop, sink, or stove. It shields the wall from water, grease, and food splatter, and it’s also one of the easiest places to add color and texture. Most run from the countertop to the bottom of the upper cabinets, though a full-height version can climb to the ceiling or range hood.
Which Kitchen Backsplash Materials Can You Install Yourself?
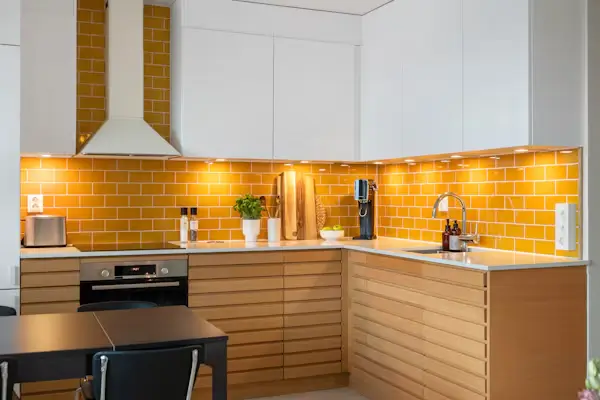
Different materials ask for different tools and patience. Here’s how the main DIY options compare.
Are Peel-and-Stick Backsplash Tiles Worth It?
They’re popular because most don’t need mortar, grout, or a tile saw. They work best on clean, smooth, dry walls that the manufacturer approves them for, since dust, grease, or textured paint can ruin adhesion.
Heat is the big limit. Not every product is rated for use near a cooktop, so confirm the rating and your appliance’s clearance requirements before putting one behind a stove. Renters should test a small hidden spot first and get the landlord’s okay, because removal can still pull off paint.
Is Ceramic or Subway Tile a Realistic Project for Beginners?
Yes, if you’re patient. Porcelain, ceramic, and mosaic tile are generally the easiest to install, while natural stone and glass are more delicate and harder to cut. Subway tile in particular is a budget-friendly classic.
For a first project, simple rectangular subway tile is the easiest to plan because it involves fewer awkward cuts and the rows are easy to keep straight. Grout fills the joints between tiles, while sealer is a separate protective product that only some tile and grout types need, so check what yours calls for.
What Other Budget-Friendly Materials Work?
- Beadboard or decorative panels: add texture and are fairly easy to install. Choose products suited to kitchen moisture and keep them away from cooking heat.
- Sheet-mounted mosaic tile: small tiles on a mesh backing, which makes spacing easier, though corners and edges still need cutting.
- Stainless steel or metal panels: modern and easy to wipe down. Check the heat rating and how the edges need to be finished.
- Scrubbable paint: fine for low-splash areas, but not a substitute for a real backsplash behind a sink or stove.
What Are the Best DIY-Friendly Backsplash Layouts?
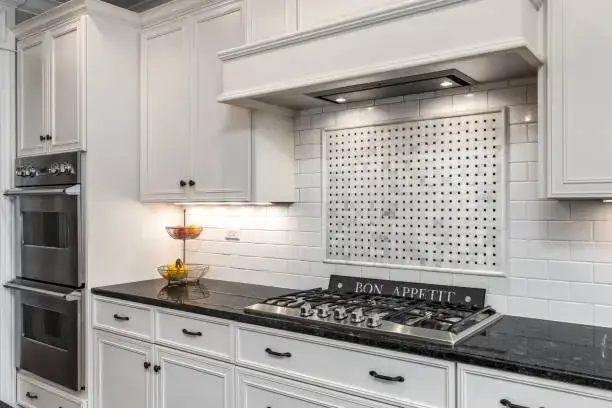
Layout decides how polished the result looks, and some patterns forgive mistakes far better than others.
Stacked (Straight Grid)
Every tile lines up in neat rows and columns. It’s simple to plan, but it also shows every flaw, because a crooked wall or uneven cabinet makes the lines look off. Use a level and work from the center out.
Running Bond (Classic Offset Subway)
Tiles are staggered like bricks. The offset joints hide small alignment errors, which makes this the most forgiving layout for beginners.
Vertical Stack
Subway tile laid upright makes the wall feel taller. It’s about as hard as a standard grid, so it’s a good way to get a fresh look without extra difficulty.
Sheet-Mounted Mosaics
Because the tiles come pre-spaced on a sheet, you set a whole section at once. It’s a practical choice when you like small tiles but don’t want to space hundreds of them one by one.
Herringbone and Diagonal Patterns
These need many angled cuts and create more waste, so order extra. Intricate layouts take longer and cost more even when professionals do them. Save these for a second project.
Accent Area Only
You don’t have to tile the whole wall. Retiling just the focal area behind the range and painting or leaving the rest is one of the ways Angi suggests to keep backsplash costs down, and it lets you try a bolder tile without a big bill.
What Should You Check Before Installing a Backsplash?
Measure and Order Extra
Multiply width by height for each section, then add the sections together. A common starting point is to order about 10% more than you calculate to cover cuts and breakage, and more for diagonal patterns or walls with lots of corners. Keep a few spare tiles for future repairs.
Inspect the Wall
The surface should be clean, dry, stable, and free of grease. Repair small defects and let everything dry fully. If the wall is damp or crumbling, fix the moisture problem first rather than covering it.
If you’re thinking of tiling over an old backsplash, know that it can be done but many installers prefer to remove the old material and flatten the wall first, since a poor bond or trapped moisture can cause trouble later.
Check Heat Clearances
This matters most behind a stove. Read the cooktop manual and the backsplash maker’s instructions, since clearances vary by appliance. Don’t use peel-and-stick, wood-based, or other materials where their instructions prohibit it.
Plan Around Outlets and Switches
Outlets affect your layout, so plan them before setting the first row. Angi’s installation guide walks through the safe prep: turn off the power to the nearby outlets, remove the cover plates, and add electrical box extenders so the outlets sit flush with the new surface. It also recommends hiring a local electrician if you don’t have experience removing outlets and switches. If your project goes beyond cover plates and box extenders, our DIY bathroom renovation guide explains which electrical and plumbing jobs are worth handing to a pro.
Verify the power is actually off before touching anything. Moving an outlet or changing wiring is electrician territory.
Get Permission if You Rent
Even “removable” products can damage paint or drywall. Ask your landlord for written permission before changing the wall surface.
How Do You Install a Kitchen Backsplash Step by Step?
Exact steps depend on your material. Here’s the general flow for tile.
- Prep the wall. Degrease, dust, and let it dry completely.
- Plan the layout. Find the center point, usually between the stove and the hood, and dry-lay tiles outward from there. Adjust so you don’t end up with skinny slivers at visible edges.
- Spread thin-set in small sections. Use the notched trowel size recommended for your tile, and work in patches, since thin-set dries quickly.
- Set the tile with spacers. Keep a small gap above the countertop so the tile doesn’t sit directly on it.
- Cut as you go. A manual tile cutter handles ceramic and porcelain, while stone, glass, and mosaics usually call for a wet saw.
- Let the tile set. Angi’s guide allows about 24 hours before grouting, but follow your product’s instructions.
- Grout and clean. Sanded grout generally suits joints from about 1/8 to 1/2 inch, and unsanded grout suits joints up to about 1/8 inch. Angi’s guide notes grout needs roughly 24 to 72 hours to dry, then you wipe off haze and seal if your tile or grout calls for it.
- Finish the edges with flexible sealant, not grout. Tile assemblies move, and the Ceramic Tile Education Foundation stresses that movement joints are mandatory and warns that acrylic latex or siliconized “caulk” tends to dry hard, shrink, and crack. It recommends 100% silicone sealant for these joints instead. Add edge trim where tile ends in open air.
What Tools and Supplies Do You Need?
Make this list before shopping so you don’t make three trips to the store.
Tools:
- Notched trowel (size depends on your tile)
- Grout float
- Tile cutter or wet saw (a manual cutter is enough for simple ceramic cuts)
- Level and tape measure
- Tile spacers
- Painter’s tape
- Buckets and sponges
Supplies:
- Tile, plus about 10% extra
- Thin-set mortar
- Grout (sanded or unsanded, depending on joint width)
- 100% silicone sealant for the countertop joint
- Grout or tile sealer, if your materials call for it
- Wall degreaser
- Electrical box extenders for outlets and switches
- Edge trim
What Mistakes Do Beginners Make With a DIY Backsplash?
- Skipping the dry layout. You find out about the awkward sliver of tile only after the mortar has set.
- Grouting the joint at the countertop. Rigid grout cracks where the tile and counter move differently. Use flexible sealant there.
- Spreading too much thin-set at once. It dries faster than you think, so work in small sections.
- Rushing the cure times. Grouting or sealing too early can ruin a good install.
- Forgetting about outlets. Plan around them before you start, not when you hit them.
- Using heat-sensitive materials behind a stove. Check the product’s approved use first.
- Covering a damp or damaged wall. Fix the cause before you tile.
How Much Does a DIY Kitchen Backsplash Cost?
Prices swing with your region, material, and layout, so treat the numbers below as rough ballparks, not quotes.
Angi’s installation guide estimates supplies for a typical DIY backsplash at roughly $100 to $500, and rates the project as intermediate, taking about three days once drying time is counted. For comparison, Angi’s cost data puts professional installation at around $480 to $1,500 on average, or roughly $15 to $40 per square foot with labor, with a national average near $1,000 for about 35 square feet.
To build your own estimate, price three things separately: materials (tile, mortar, grout, sealant, trim), tools you don’t already own, and a cushion for extra tile and surprises. A smaller area, simple tile, and an accent-only design keep the total down the most.
Peel-and-Stick vs. Traditional Tile: Which Should You Choose?
If you rent or want a quick weekend refresh, peel-and-stick is the practical pick, as long as it’s approved for the spot. If you own the place, plan to stay, and can spare a few days, tile is the longer-lasting choice.
| Feature | Peel-and-Stick | Traditional Tile |
|---|---|---|
| Installation | Often simpler | More prep and tools |
| Starting cost | Often lower | Varies by tile and supplies |
| Grout | Usually not needed | Usually needed |
| Heat suitability | Product-specific, sometimes limited | Depends on tile and installation |
| Removal | May damage paint or drywall | Usually harder |
| Best for | Renters and low-exposure areas | Permanent installations |
How Do You Pick a Backsplash That Works With Your Cabinets and Countertops?
A backsplash can be installed perfectly and still look off if the color clashes. Start with undertones: cabinets and counters lean warm (cream, beige) or cool (blue-gray, crisp white), and the same white tile can look quite different beside each. Hold samples up against your existing finishes under your actual kitchen lighting.
Then think about scale. A compact kitchen usually looks better with a simple tile and quiet pattern, while a larger one can handle a feature section behind the range. If your countertop already has a strong pattern, choose a calmer backsplash to balance it. If you can, view samples at different times of day before you buy.
Final Thoughts
A DIY backsplash is one of the more satisfying kitchen upgrades because a small area makes a big visual difference. Match the material to the spot, choose a layout your skills can handle, and treat the countertop joint and the outlets with care.
Start modest if it’s your first time. A simple offset subway layout or an accent wall behind the range will teach you plenty, and you can get bolder on the next one.
What is the cheapest way to update a backsplash?
Paint or an inexpensive peel-and-stick product is usually the cheapest, depending on the area. Neither suits every high-splash or high-heat spot, so check the intended use first.
Can you install a backsplash over existing tile or drywall?
Sometimes. The surface must be stable, clean, dry, and suitable for your installation system. Don’t cover loose tile or damaged, damp drywall.
Is peel-and-stick safe behind a stove?
Only if that specific product is approved for the location and meets the appliance’s clearance requirements.